How to Hike the Choquequirao Trek: Itinerary, Tips & What to Expect
Let’s be honest: very few travelers leave Peru without checking Machu Picchu off their list.
It’s an almost obligatory stop—a place that fascinates, amazes, and, if we’re being real, can sometimes feel a bit underwhelming.
Make no mistake: Machu Picchu is extraordinary. But during high season, it can also feel like navigating through a dense crowd, which might dull the magic a little.
While we were in Cusco, we knew we wanted to reach Machu Picchu by trekking. But once we arrived, we were overwhelmed by the sheer number of trekking options—at all price points, and all crowded.
We started to wonder: Is a trek to Machu Picchu really the experience we’re looking for?
That’s when we remembered a tip from a German couple we’d met a few weeks earlier: “Why not do the 9-day trek that passes through the Choquequirao ruins?”
A trek that long—and solo, without a guide—felt intimidating at first. We’re athletic, but not exactly seasoned hikers…
And yet, that journey turned out to be one of the most unforgettable adventures of our entire trip around the world.
Here’s everything you need to know to tackle Choquequirao on your own:
Sommaire
- How to Hike the Choquequirao Trek: Itinerary, Tips & What to Expect
- Choquequirao Trek: Key Facts and Technical Details
- Choquequirao to Machu Picchu Trek: Complete Itinerary and Route Overview
- Day 0: Getting to the Starting Point – Cachora
- Day 1: From Cachora to Santa Rosa
- Day 2: From Santa Rosa to Choquequirao
- Day 3: Visit to Choquequirao
- Day 4: From Choquequirao to Maizal
- Day 5: From Maizal to Yanama
- Day 6: Yanama to Tortora
- Day 7: From Tortora to Playa
- Day 8: From Playa to Aguas Calientes
- Day 9: Visiting Machu Picchu
- What to Pack for the Choquequirao Trek
- Can I do the Choquequirao trek on my own?
- Budget: How much does the Choquequirao trek cost?
- Is the Choquequirao trek difficult?
- Follow Novo-Monde’s adventures
- Which agency to choose for the Choquequirao trek?
- Where to stay in Cuzco?
- Where to stay in Aguas Calientes?
- Find the Best Deals on Flights to Peru
- Rent a Car in Peru
- Traveling to Peru? These articles will help you!
Choquequirao Trek: Key Facts and Technical Details
- Starting point: Village of Cachora
- End point: Aguas Calientes, gateway to Machu Picchu
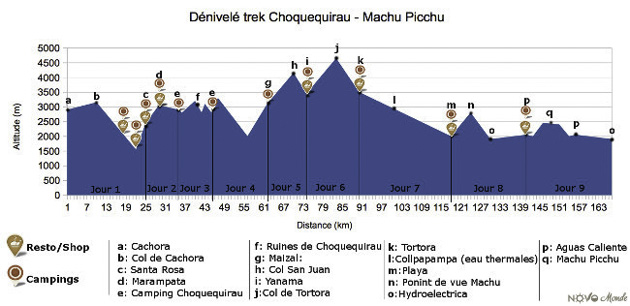
- Total distance: Approx. 103 miles (165 km)
- Total elevation gain: Around 23,950 ft (7,300 m)
- Total descent: Around 26,900 ft (8,200 m)
Below is the elevation profile of the route, showing the significant altitude changes along the way.
To find the full-size map and download it, go to this choquequirao trekking article
Choquequirao to Machu Picchu Trek: Complete Itinerary and Route Overview
Day 0: Getting to the Starting Point – Cachora
The trek doesn’t begin in Cusco itself—you’ll first need to reach the village of Cachora, the official starting point of the Choquequirao trek.
To get there, take a bus from Cusco to Abancay (daily departures at 6 a.m. and 10 a.m.) and ask the driver to drop you off at the turnoff to Cachora.
From the turnoff, hop on a collective taxi to Cachora (about 45 minutes). For a more relaxed start, I recommend taking the 10 a.m. bus and spending the night in Cachora—there are a few simple but decent hostels in the village.
- Bus from Cusco to Abancay: 4 hours, around 30–40 soles
- Colectivo from Abancay to Cachora: about 10 soles per person
Day 1: From Cachora to Santa Rosa
- Distance: 15 miles
- Ascent: 2,790 ft
- Descent: approx. 5,250 ft
- Estimated time: about 8 hours
Today the real adventure begins!
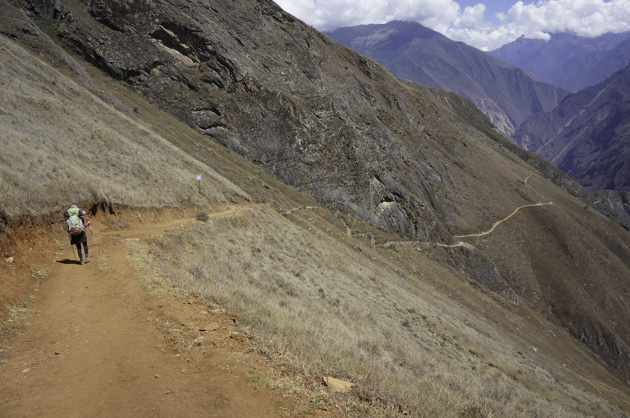
We set out early from Cachora, heading toward the Santa Rosa campsite. The first 5.5 miles of the trail are relatively flat, tracing the mountainside until we reach the Capuliyoc Pass—count around 2.5 hours for this stretch with breathtaking views of the Apurímac canyon.
From there, the descent begins—7.5 miles downhill on a narrow dirt path, dropping over 5,200 feet in elevation. It’s tough on the knees, so trekking poles are highly recommended!
At the bottom, near the Apurímac River, there’s a small campsite where many hikers stop for the night. But be aware: mosquitoes are fierce near the river, so we preferred to push on for another 1.9 miles with an intense 1,800 ft ascent to reach Santa Rosa.
Exhausted but relieved to escape the bugs, we arrived at our first campsite—tired, sweaty, but happy to be on the trail!
Day 2: From Santa Rosa to Choquequirao
- Distance: 6.4 miles
- Elevation gain: 3,280 ft
- Descent: approx. 328 ft
- Estimated time: around 5 hours
This second day is straightforward in terms of direction, but not in effort—you need to climb up to Choquequirao.
The ascent involves over 1,000 meters (3,280 ft) of elevation gain under the blazing sun. Fortunately, the panoramic views of the Apurímac Valley along the way make the challenge worthwhile!
At the top, you’ll reach the small village of Marampata, where you’ll find a few places to buy food and camp.
However, since it’s possible to camp directly at the Choquequirao ruins (about 2.5 miles further), we highly recommend continuing—it’s a beautiful stretch.
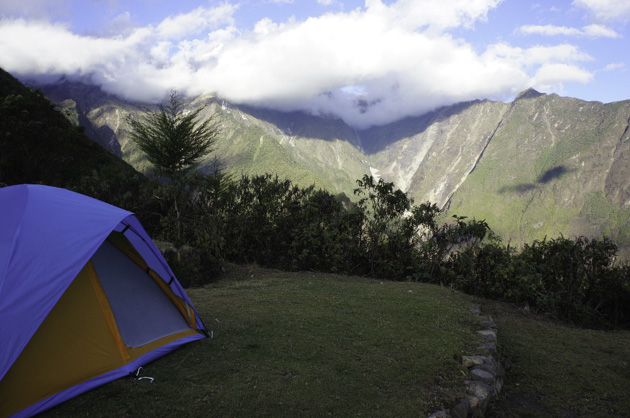
We reached the Choquequirao campsite around 2:00 p.m., in time to relax and unwind.
Many tour groups were already heading to explore the ruins that afternoon. If you only have a short time and Choquequirao is your final destination, this can work.
But in our opinion, the ruins truly deserve a full day of exploration—so we spent the rest of the day resting and saving our energy for tomorrow’s visit.
Day 3: Visit to Choquequirao
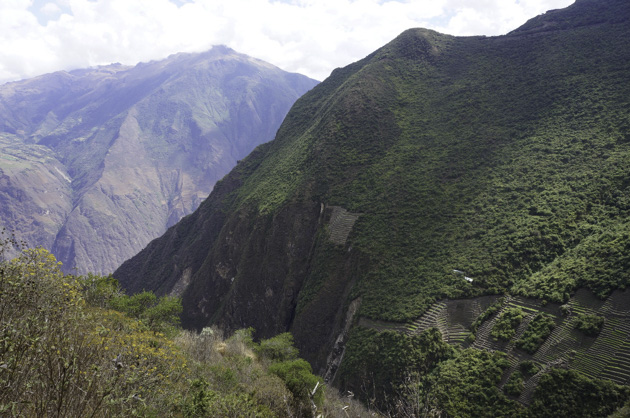
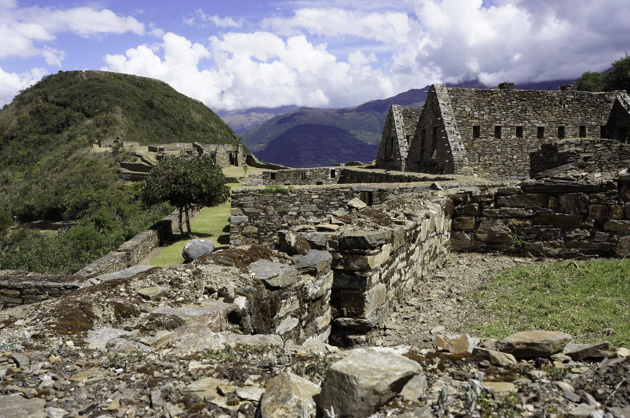
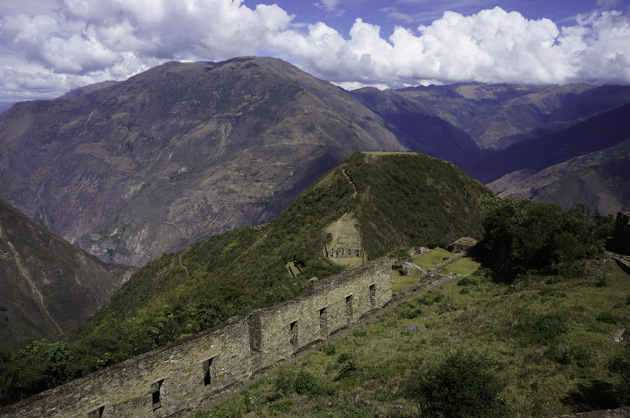
Did you know that Choquequirao is actually larger in area than Machu Picchu? That’s why a full day is just right to explore its remarkable Inca ruins and soak in the breathtaking mountain views.
The best part? You’ll likely have the entire site almost to yourself!
Since Choquequirao is only accessible on foot—and requires a minimum of four days of hiking (round trip)—the site remains virtually untouched by mass tourism.
This means a rare opportunity to explore one of Peru’s most impressive archaeological treasures in total peace and quiet—something that’s becoming increasingly rare in today’s travel world!
Day 4: From Choquequirao to Maizal
- Distance: 10.5 miles
- Ascent: 4,590 ft
- Descent: 4,265 ft
- Walking time: around 8.5 hours
This is often considered one of the most challenging days of the Choquequirao to Machu Picchu trek!
The day begins with a steady climb of about 1,300 ft to reach the Choquequirao Pass. From there, it’s a steep descent of over 4,200 ft to the Rio Blanco.
Along the way, you’ll pass the stunning Inca ruins of Pinchanuyoc—an incredibly remote archaeological site where you’ll likely be completely alone to take in the beauty and silence of the surroundings.
After a picnic lunch by the river, surrounded by hundreds of wild orchids, comes the most intense part: a 3,280 ft ascent to reach Maizal.
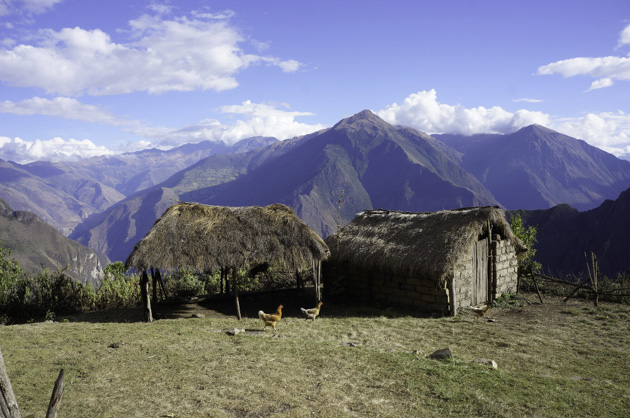
Your reward at the end of the day is a stay at Valentín’s farm, the only inhabited spot in the area. There, a kind Quechua-speaking grandmother welcomes trekkers with the offer to camp in her garden for just 5 soles (plus 3 soles for a refreshing shower).
Day 5: From Maizal to Yanama
- Distance: 10.5 miles
- Elevation gain: 4,590 ft
- Negative difference in altitude: 4,265 ft
- Walking time: around 8h30
When we woke up in Maizal we were warmly welcomed by the silver-haired nana who lives here, a real ray of sunshine!
So after a hearty breakfast we set off, taking care to fill all our water bottles at Mamita’s fountain, as she had warned us: No water on the way to Yanama!
Before setting off we made sure to take the right road by asking Mamita for advice. With a big smile she showed us the way and told us “2 hours to the pass, then 1h30 to Yanama”
Seeing the distance (10.5 miles) and especially the elevation gain, we thought it would take longer, however a granny must be reliable, especially since her husband makes the trip several times a week with his mules to fetch supplies to Yanama.
So I’ll tell you one thing: Mamita’s husband is in great shape for his 70th birthday, because it took us almost 4h30 to get to the pass!
Of course, her husband is not loaded, his mules carry for him, but he is 40 years older than us…. At the same time we cross paths with her husband on the road, and he doesn’t really walk…. No, he runs behind his mules!
So we finally arrived in Yanama after 5h30 of walking! But in the village a big party was waiting for us, with a soccer tournament gathering all the young people of the valley, a great atmosphere to end the day with a good meal prepared with love by our host of the day!
- Useful information: If you are tired (or too tired, I should say), you should know that the road has recently arrived in Yanama. Therefore, it is possible to take a collective cab every morning and be dropped off at the next stop or in Playa village (day 7)!
Day 6: Yanama to Tortora
- Distance: 10 miles
- Ascent: 3,940 ft
- Negative difference in altitude: 3,770 ft
- Walking time: about 7h30
This day was on paper one of the easiest: 10 miles, 3,940 ft. ascent followed by 3,770 ft. descent, which we had planned to do in 5 hours, at most.
But for me, the accumulation of fatigue was beginning to show seriously, and the ascent to the Mariano Llamoja pass (15,290 ft) was torture. After 5 hours, we arrived totally exhausted… For me, it was the hardest day of this trek!
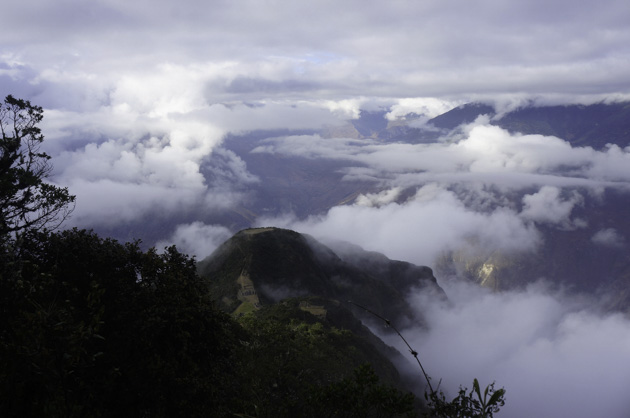
Fortunately, the landscapes during this day are absolutely sublime! We let you judge for yourself:
Day 7: From Tortora to Playa
- Distance: 17.4 miles
- Elevation gain: 0 ft.
- Negative difference in altitude: 4,920 ft
- Walking time: about 6h30
A great day of hiking in terms of miles, but also the first (and only) day of this 9-day route without any positive elevation gain. Believe me, that’s good for the calves!
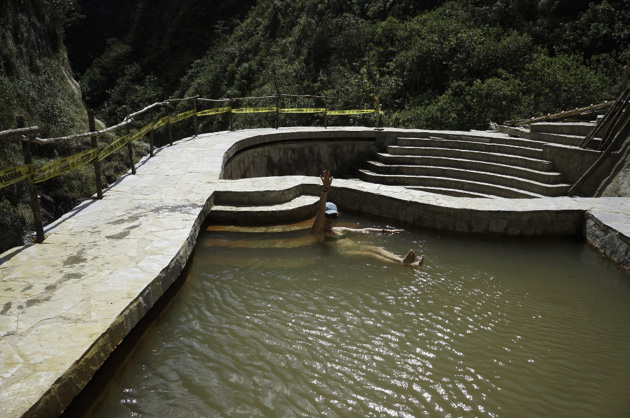
Especially since we left early from Tortora and arrived at the Collapampa hot springs at 10 am. It is important to know that most of the hikers who do the Salkantay trek stop at these springs, but they only arrive here in the mid-afternoon… so we were on our own to enjoy a well-deserved hot bath!
After the bath, we still had about ten kilometers to go to the village of Playa.
Playa is the meeting point for many organized excursions in the region, so the excitement is at its peak!
We took advantage of the many stores to buy some food and then continued 1.9 mile more, where the Inca trail begins, which we will take the next day to get (finally) to Machu Picchu!
At the foot of the trail there was a beautiful field in the heart of the coffee plantations, a real treat!
Day 8: From Playa to Aguas Calientes
- Distance: 14 miles
- Elevation gain: 2,620 ft
- Negative difference in altitude: 2,950 ft
- Walking time: about 7 hours
We were looking forward to this day! In fact, this trail is known for offering a first view of Machu Picchu from the valley in front of us!
So it was early in the morning and with lots of energy when we started this last day of hiking. And needless to say, the trail is much easier than the previous days.
The trail up the first 2,620 foot follows a fairly gentle slope, before we knew it we had reached the top!
I can guarantee that after the endless climbs of the previous days it was a walk in the park….
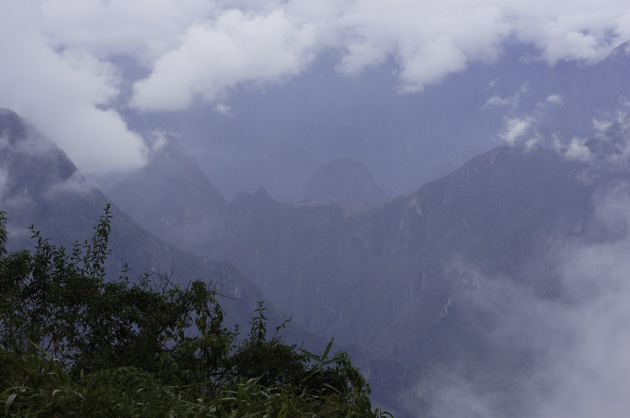
At the top, unfortunately, we didn’t have time on our side. We could barely see the ruins among the cloudy scenery, but there it was, right in front of us… at last!!!
After a little last descent we arrived at the Hidroelectrica. A place well known by backpackers because from there you can get to Aguas Calientes by the train tracks and save the price of the ticket.
For us, the arrival at Hidroelectrica was a bit of a shock… After spending almost 8 days alone with nature, we are now trapped in a human tide!
Backpackers are brought here by the dozens in minibuses and then begin the short 2 hour walk along the train tracks. Let’s face it, walking along them is not glamorous, let alone practical.
We walk single file, and often a bit blocked by the pace of those going upstream. But what the heck, probably not the most interesting part of this hike, but it was the last few miles, what a joy! 🙂
Day 9: Visiting Machu Picchu
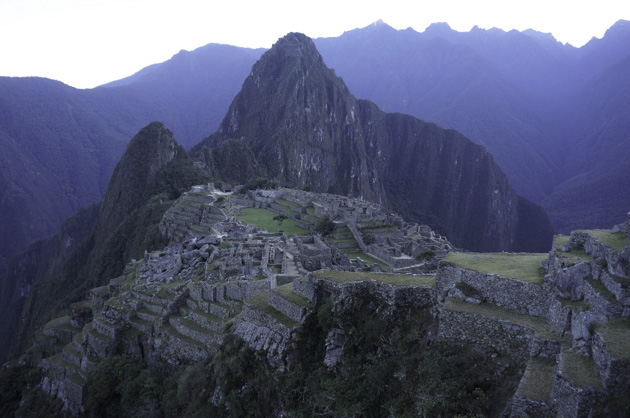
Our final day began with one last early wake-up call and a short warm-up hike to reach the entrance of the iconic Machu Picchu citadel.
We left at 5:00 a.m. to be among the first in line and experience the legendary Inca ruins in relative peace—at least for a few magical moments!
As incredible as Machu Picchu is, what truly left the biggest impression on me was the journey to get there. The solitude, the landscapes, and the physical effort made this adventure unforgettable.
What to Pack for the Choquequirao Trek
If you’re doing the Choquequirao trek with an agency, you’ll only need to carry a small daypack with your personal items. Your main gear will be handled by the support team.
In addition to your standard hiking gear, don’t forget a rain jacket and a swimsuit—you might find hot springs along the way to relax in!
If you’re trekking independently, you’ll need to bring everything for camping and cooking, as well as your meals and water supplies.
Here’s what we packed for the 9-day trek:
- 1 compact 3-person tent
- 2 self-inflating sleeping mats
- 1 camping stove + fuel
- 1 small pot and 2 forks
- Swiss army knife
- Thermos
- First aid kit
- Water purification tablets (e.g., Micro-pur) or a UV filter
- Topographic map of the region (available in Cusco)
- 2 sleeping bags (rated to -10°C / 14°F)
- 2 headlamps
- 2 sets of hiking poles
- 2 rolls of toilet paper
- Personal clothing: 2 hiking pants, 3 T-shirts, thermal layers, windbreaker, raincoat, swimsuit, underwear, toiletries
- Food for 9 days of trekking
- 5 x 1L water bottles
About meals: In a few villages along the way, you can eat with local families or find small shops for basic food. But this is only possible in certain spots, so be well prepared!
We recommend packing at least: 5 breakfasts, 6 lunches, 4 dinners, and plenty of snacks for energy boosts throughout the day.
Water during the trek: You’ll find rivers and streams along the route, but you must carry enough water bottles and purification tablets (or a UV filter). Be aware that on Days 4 and 5, there are no water sources, so make sure to fill up your bottles in Maizal and Yanama before leaving. Plan on carrying at least 2 liters per person per day in those sections.
In our case, our backpacks weighed about 18 lbs (8 kg) for me and 33 lbs (15 kg) for Benoit—not counting water. Yes, it’s quite a difference, but it helped us balance the challenge: he’s a seasoned athlete, and I’m more of a weekend warrior.
Can I do the Choquequirao trek on my own?
Yes, it’s possible to do the Choquequirao trek without an agency, but we highly recommend going with at least one companion. The route is long and remote, and very few people walk this trail daily—so in case of any issue, it’s much safer not to go alone.
If you plan to hike only to the Choquequirao ruins and not beyond, doing it solo is entirely doable. While you won’t find crowds, you’ll likely meet a few hikers on the way, and there are basic villages or huts where you can resupply.
Whether to go with a guide or independently really depends on your fitness level and how much comfort you’re looking for.
The trail is well-marked and not technically difficult to follow, so navigation isn’t a concern. However, if you go on your own, remember you’ll need to carry all your gear and food, which adds to the challenge.
You can also hire a mule and muleteer to help carry your load (expect to pay 80–90 soles per day, plus food for the muleteer). It’s easiest to arrange this in the village of Cachora. Further along the trail, it becomes more difficult to find someone.
When we tried to rent a mule at the Choquequirao ruins, we were told there were no available animals for the return via the so-called “camino de los locos.” So always plan ahead—and expect to pay for the return trip as well (usually 2–3 days).
If you’d rather not deal with logistics or heavy gear, joining a guided trek is a great option (click here to book)!
Budget: How much does the Choquequirao trek cost?
It depends on whether you book with an agency or do it independently.
In Cusco, many agencies offer 5- to 7-day Choquequirao treks. Prices range from $600 to over $1,300 USD per person, depending on the length, itinerary, group size, and whether the trek includes Machu Picchu at the end.
- Tours generally include round-trip transport from Cusco, guide, food, tents, entrance to Choquequirao, and (if included) Machu Picchu tickets and a night in Aguas Calientes.
We did the trek without an agency, carrying our own gear and food from Cusco, and returned to Cusco by bus. The total cost came to about $250 USD per person for 9 days. This included all meals, entrance fees to Choquequirao and Machu Picchu, a private guide at Machu Picchu, and snacks bought along the way.
Is the Choquequirao trek difficult?
Don’t let this discourage you—because for me, trekking to Choquequirao was one of the most rewarding experiences of my trip around the world…
That said, I won’t lie: physically, it’s a real challenge! The trail covers around 103 miles (166 km), with a punishing 4,920-foot elevation gain—and that’s not including the weight of your backpack.
You don’t need to be an expert trekker to do it. The trail is clear and not dangerous, but it does require a good fitness level, endurance, and motivation.
There will be tough moments—but trust me, the views, solitude, and sense of achievement make it more than worth it.
All photos are copyright of the Novo-Monde blog
Follow Novo-Monde’s adventures
Website / Facebook Page / Instagram
Which agency to choose for the Choquequirao trek?
If you’re dreaming of doing the Choquequirao trek but prefer not to go it alone, the best option is to book with a reliable agency and an experienced guide.
As is often the case in Peru, be very cautious with agencies offering prices well below the average. These agencies often underpay their teams (guides, porters, cooks) and provide low-quality equipment.
It’s essential to support operators who treat their staff fairly and provide safe, high-quality treks.
You can book your 5-day/4-night Choquequirao trek with a trusted agency right here:
Where to stay in Cuzco?
Where to Stay in Cusco
- Backpacker La Bo’M: One of the best hostels in Cusco. Founded by Sarah, a French expat, it includes a delicious crêperie next door. Perfectly located in the charming neighborhood of San Blas, it offers good Wi-Fi, a cozy vibe, and of course, amazing crêpes to start your day! Dorms from only $13 USD and private rooms from $33 USD.
- La Casona Real Cusco: For those looking for more comfort, this charming traditional-style guesthouse is located on a quiet street just steps from the Plaza de Armas. Impeccably clean, with hot water, great Wi-Fi, and a warm welcome. Breakfast included, all from just $76 USD per night!
- Hotel Tierra Viva Cusco San Blas: In the lovely San Blas neighborhood, this upscale hotel offers spacious rooms with very comfortable beds. Its modern décor with local touches and peaceful interior courtyard make for a relaxing stay. Buffet breakfast included. From $98 USD per night!
- Antigua Casona San Blas: A chic and intimate 4-star hotel in San Blas. It features very comfortable rooms, a warm atmosphere, and a tasteful blend of modern and traditional décor. Don’t miss their Piedra & Sal restaurant, one of Cusco’s best. Excellent breakfast included. From $250 USD per night.
- Palacio del Inka, a Luxury Collection Hotel: For a romantic stay in Cusco, this 5-star gem is housed in a spectacular colonial building across from Coricancha, with roots dating back to Inca times. Enjoy the indoor pool, gym, spa, bar, and restaurant. Delicious breakfast included. From $325 USD per night.
Where to stay in Aguas Calientes?
Where to Stay in Aguas Calientes (Machu Picchu Pueblo)
- Municipal Camping: The cheapest option is camping in Aguas Calientes, just 20 minutes from downtown. For only 15 soles per tent, you get access to restrooms, cold showers, and a cooking area. Don’t forget to bring toilet paper and food beforehand. Not recommended from December to February due to heavy rains.
- Nativus Hostel Machu Picchu: A clean and colorful hostel with a rooftop terrace, happy hour bar, and restaurant. Great location away from the noise. Breakfast included. Dorm beds from just $14 USD and private rooms from $54 USD.
- Panorama B&B: Just a few steps from the market, train station, and Machu Picchu bus stop. Offers panoramic views of the river and surrounding mountains. A comfortable hotel with a warm welcome from Christophe, the owner, always ready to share local tips. From $101 USD per night.
- Casa del Sol Boutique Hotel 4*: Ideal for a romantic stay, with rooms offering river views and jacuzzi, spa, and pool access. Breakfast and dinner included at the Manko Restaurant. From $227 USD per night.
- Inkaterra Machu Picchu Pueblo Hotel 5*: This stunning eco-lodge on the banks of the Vilcanota River is the best option for a luxury stay in Peru. Set in a private 5-hectare garden home to 372 orchid species, 162 bird species, 108 butterfly species, and even a freshwater waterfall. Breakfast and dinner included. From $448 USD per night.
Find the Best Deals on Flights to Peru
Planning your adventure to Peru? Don’t overspend on airfare. Use this flight comparison tool powered by Skyscanner to easily track down the cheapest international flights to Peru and the most affordable domestic flights within the country.
It’s fast, reliable, and compares hundreds of airlines to help you save time and money—whether you’re flying into Lima, Cusco, Arequipa or anywhere else:
Rent a Car in Peru
Renting a car is one of the best ways to explore Peru at your own pace and make the most of your trip!
Personally, I always use Booking.com Cars for a few key reasons:
- Easily compare prices from all major rental agencies in one place—finding the best deal has never been easier!
- Free cancellation on most bookings, so you can reserve with peace of mind.
- Better insurance coverage at a lower price than rental companies—saving you money with no extra effort.
Click the button below to find the best car rental deals in Peru:
Rent a car
Book entrance tickets and guided visits
Take a travel insurance
Book a tour
✈️ Book your flight
Traveling to Peru? These articles will help you!
Discover all my articles about Peru: All my tips and itineraries to plan your trip in one place!
40 EPIC Things to Do in Peru (+ My Best Tips)
- 30 Epic things to do in Cusco (+Tips)
- Aguas Calientes (Machu Picchu Pueblo): Tips, Hotels, and What to Do
- Machu Picchu: Tickets, Circuits, and Top Tips to Plan Your Visit
- Huayna Picchu vs. Machu Picchu Mountain: Which Hike is Best?
- Inca Trail: The Definitive Guide to the Classic Trek to Machu Picchu
- Salkantay Trek: A Complete Guide to the Best Inca Trail Alternative
- Inca Jungle Trail (Machu Picchu): What to Expect + My Experience
- Huchuy Qosqo Trek: The Definitive Guide + Tips
- Sacred Valley: 23 Best Places to Visit (+Where to Stay)
- Ollantaytambo: 15 Epic Things to Do in the Heart of the Sacred Valley
- Pisac: The 12 Best Places to Visit (+ Tips)
- Maras and Moray: How to Get There, Entrance Fees, and Tips
- Urubamba: The Best 10 Places to Visit
- Laguna Humantay (Cusco): How to Get There, What to Expect, and Tips
- How to Visit Rainbow Mountain from Cusco: Hike, Tours & Tips
- Itinerary: 5-6 days in Peru – Lima, Arequipa, Colca Canyon, Cusco, Sacred Valley and Machu Picchu
- Itinerary: 7-8 days in Peru – See the maximum in one week
- Itinerary: 10 days in Peru – The ideal itinerary for a short stay in Peru
- Itinerary: 2 weeks in Peru – The classic route
- Itinerary: 15 days in Peru – An itinerary that includes northern Peru
- Itinerary: 3 weeks in Peru
- Itinerary: 3 weeks in Peru + Bolivia – The best itinerary for visiting both countries
- Itinerary: 1 month in Peru – What to see and do in 30-31 days
You’re using Pinterest? Here is the picture to pin!
